Blender のノードで作成した輪郭の一部を消す方法
ノードを使って輪郭を抽出する のは比較的簡単だ. しかし抽出段階で不要な輪郭を消すのは難しい. この記事では輪郭が出てほしくないところにポリゴンを配置し, アルファを使って輪郭を非表示にする方法を紹介する.
ポリゴンの配置
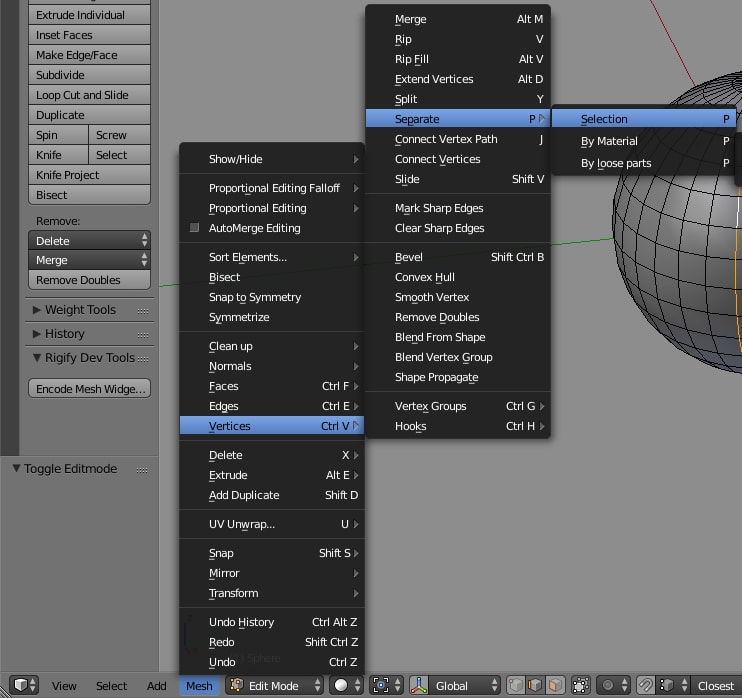
エッジの場合
エッジをカーブに変換し厚みをつける. 輪郭の出てほしくないエッジを選択し P > Selection でエッジを分離する; エッジの場合,複製しなくても元のエッジはなくならない.
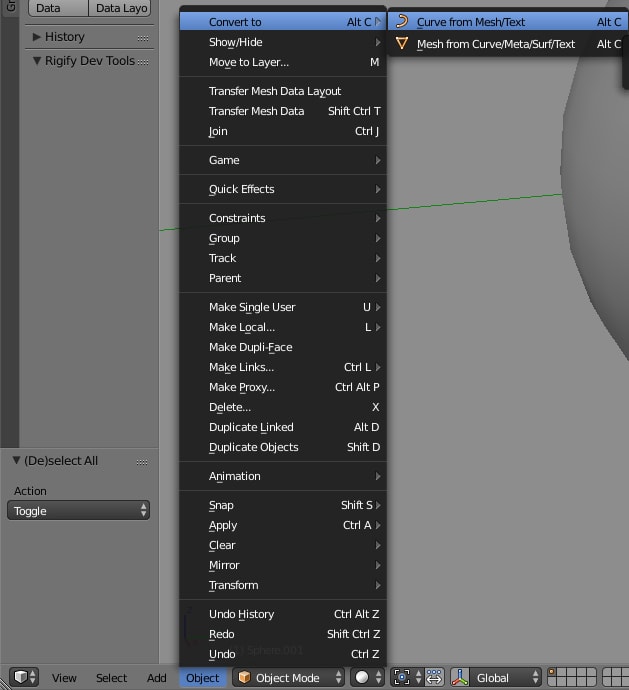
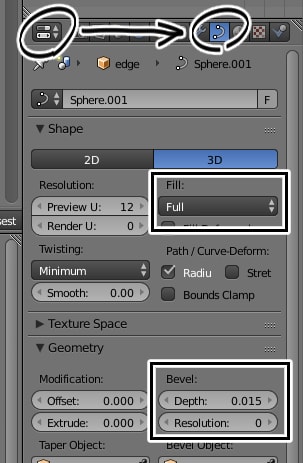
分離したエッジを Alt + C > Curve from Mesh でカーブにする. カーブにしたら適当な大きさで厚みをつける.
ポリゴンの場合
ポリゴンを複製し(Shift + D),Separate(P > Selection)で分離する.
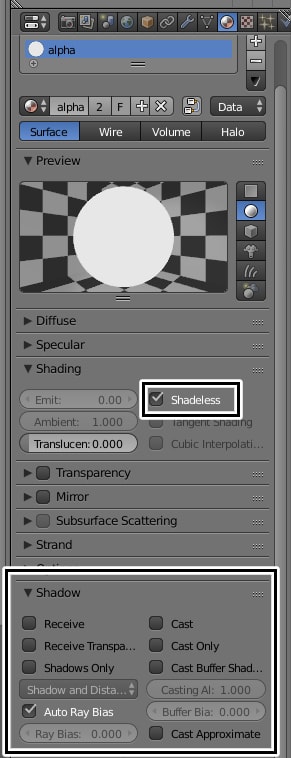
アルファ用ポリゴンのマテリアル
シェーディング,影, AO を無効にしたマテリアルを作成したポリゴンに適用する.
シーンの設定とレンダリング
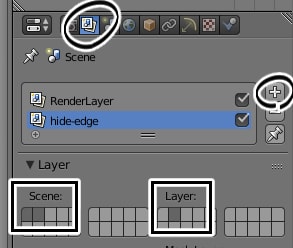
レイヤー設定
アルファ用オブジェクトをレンダリング用オブジェクトと別のレイヤーに入れる. この記事ではレイヤー 1 にレンダリング用オブジェクトを配置し, レイヤー 2 にアルファ用オブジェクトを配置している.
シーンの設定
アルファ用のシーンを作成する. シーンを作成し hide-edge と名前をつける. Scene と Layer をそれぞれ以下のように設定する.

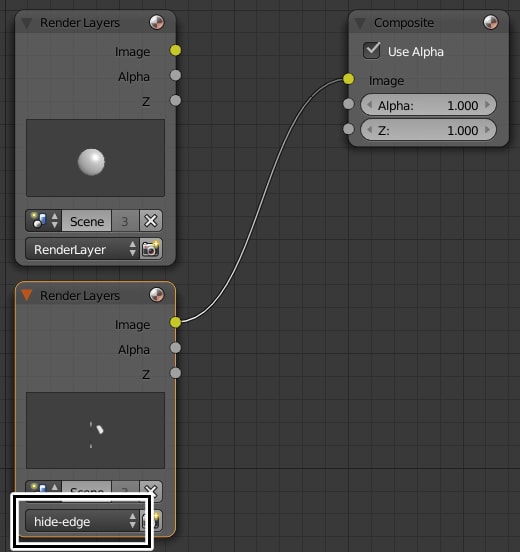
シーンの読み込み
ノードエディタで Render Layers を追加(Shift + A > Input)し,hide-edge レイヤーを選択する.
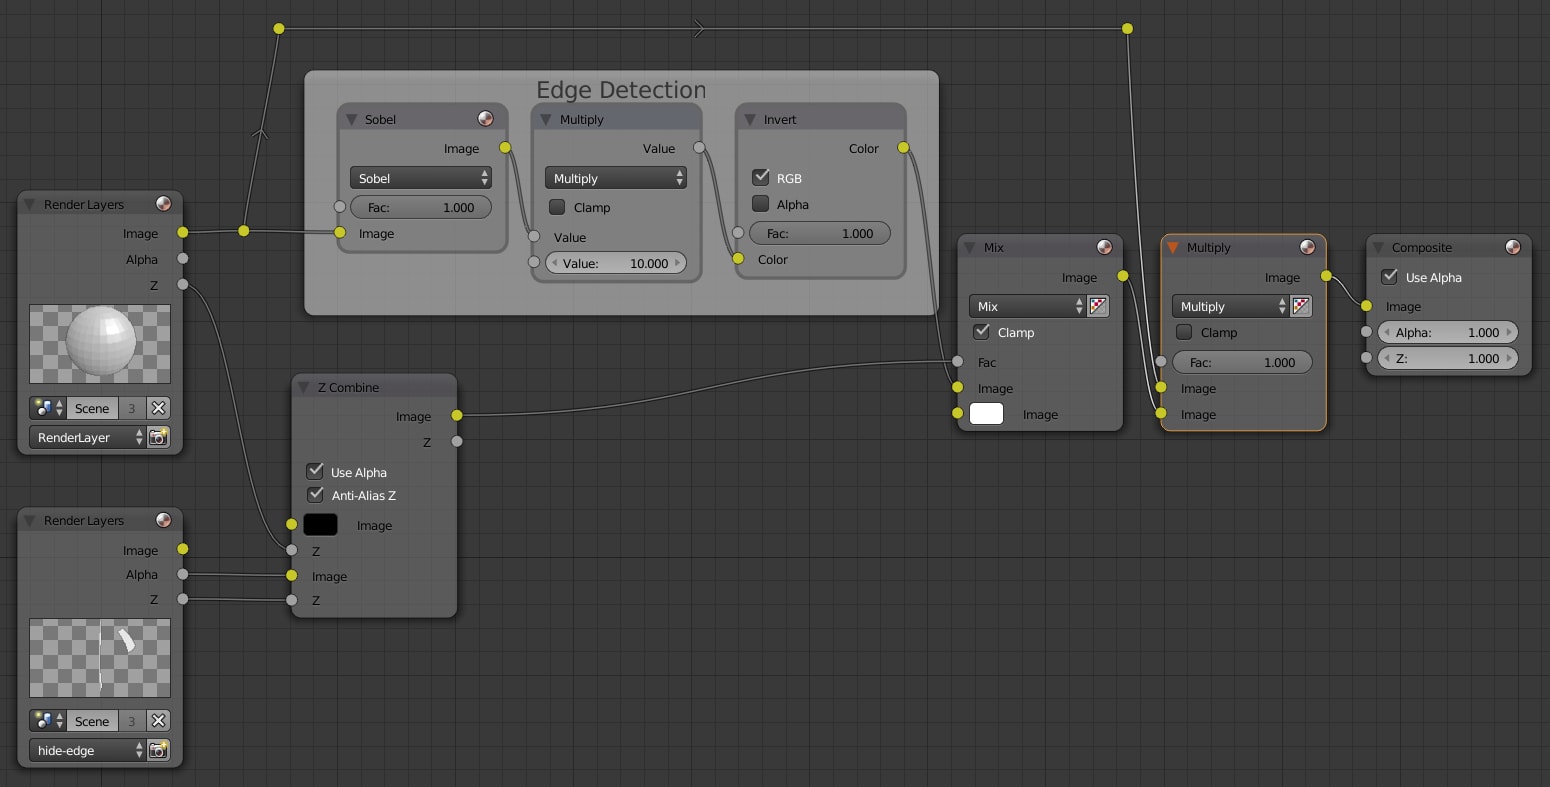
実際に使用するには以下のようにする. アルファ用オブジェクトとレンダリング用オブジェクトとは別々にレンダリングされるため, 本来ならば見えない位置にあるアルファ用オブジェクトがレンダリングされることがある. Z Combine はそのようなアルファ用オブジェクトを非表示にするために使われている.
関連記事
Blender 記事の目次